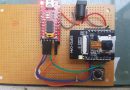
WiFi Manager 3 in 1
ภายหลังการสร้างชิ้นงานตระกูล WiFi และต้องการจะนำส่งผู้ใช้งาน หรือกรณีที่เราซื้ออุปกรณ์ WiFi มาจากห้างร้าน ครั้นเมื่อจะต้องใช้งานเราจะต้องตั้งค่า WiFi และ Password ให้กับมัน โดยไม่จำเป็นต้องมาเสียบายโปรแกรมและลง โค้ด
วันนี้จึงจะนำเอาบทสรุปการตั้งค่า WiFi สำหรับ บอร์ด 3 ตัวคือ ESP8266, ESP32 และ Heltec LoRa ESP32 โดยใช้ Library ที่สำคัญ คือ WiFi Manager , ArduinoJson (5.13.2) , SPIFFS และ ESP8266WiFi (สำหรับ esp8266) และ ESP8266WebServer, ( esp8266) WebServer (esp32 และ Heltect)
ขอบคุณคลิปจาก เน็ต ทั้ง 3 แหล่งที่ช่วยประกอบกัน ทั้งของเพื่อน และจากต่างประเทศ
เริ่มกันกับโค้ดสำหรับ esp8266 ก่อนเลย
/*********
  Rui Santos
  Complete project details at https://randomnerdtutorials.com
*********/
#include <FS.h> //this needs to be first, or it all crashes and burns...
#include <ESP8266WiFi.h>
#include <DNSServer.h>
#include <ESP8266WebServer.h>
#include <WiFiManager.h>          // https://github.com/tzapu/WiFiManager
#include <ArduinoJson.h>          // https://github.com/bblanchon/ArduinoJson
// use json 5.13.2 only
// Set web server port number to 80
WiFiServer server(80);
// Variable to store the HTTP request
String header;
// Auxiliar variables to store the current output state
String outputState = "off";
// Assign output variables to GPIO pins
char output[2] = "5";
//flag for saving data
bool shouldSaveConfig = false;
//callback notifying us of the need to save config
void saveConfigCallback () {
  Serial.println("Should save config");
  shouldSaveConfig = true;
}
void setup() {
  Serial.begin(115200);
  //clean FS, for testing
  //SPIFFS.format();
  //read configuration from FS json
  Serial.println("mounting FS...");
  if (SPIFFS.begin()) {
    Serial.println("mounted file system");
    if (SPIFFS.exists("/config.json")) {
      //file exists, reading and loading
      Serial.println("reading config file");
      File configFile = SPIFFS.open("/config.json", "r");
      if (configFile) {
        Serial.println("opened config file");
        size_t size = configFile.size();
        // Allocate a buffer to store contents of the file.
        std::unique_ptr<char[]> buf(new char[size]);
        configFile.readBytes(buf.get(), size);
        DynamicJsonBuffer jsonBuffer;
        JsonObject& json = jsonBuffer.parseObject(buf.get());
        json.printTo(Serial);
        if (json.success()) {
          Serial.println("\nparsed json");
          strcpy(output, json["output"]);
        } else {
          Serial.println("failed to load json config");
        }
      }
    }
  } else {
    Serial.println("failed to mount FS");
  }
  //end read
  WiFiManagerParameter custom_output("output", "output", output, 2);
  // WiFiManager
  // Local intialization. Once its business is done, there is no need to keep it around
  WiFiManager wifiManager;
  //set config save notify callback
  wifiManager.setSaveConfigCallback(saveConfigCallback);
  // set custom ip for portal
  //wifiManager.setAPConfig(IPAddress(10,0,1,1), IPAddress(10,0,1,1), IPAddress(255,255,255,0));
  //add all your parameters here
  wifiManager.addParameter(&custom_output);
  // Uncomment and run it once, if you want to erase all the stored information
  wifiManager.resetSettings();
  //set minimu quality of signal so it ignores AP's under that quality
  //defaults to 8%
  //wifiManager.setMinimumSignalQuality();
  //sets timeout until configuration portal gets turned off
  //useful to make it all retry or go to sleep
  //in seconds
  //wifiManager.setTimeout(120);
  // fetches ssid and pass from eeprom and tries to connect
  // if it does not connect it starts an access point with the specified name
  // here  "AutoConnectAP"
  // and goes into a blocking loop awaiting configuration
  wifiManager.autoConnect("AutoConnectAP");
  // or use this for auto generated name ESP + ChipID
  //wifiManager.autoConnect();
  // if you get here you have connected to the WiFi
  Serial.println("Connected.");
  strcpy(output, custom_output.getValue());
  //save the custom parameters to FS
  if (shouldSaveConfig) {
    Serial.println("saving config");
    DynamicJsonBuffer jsonBuffer;
    JsonObject& json = jsonBuffer.createObject();
    json["output"] = output;
    File configFile = SPIFFS.open("/config.json", "w");
    if (!configFile) {
      Serial.println("failed to open config file for writing");
    }
    json.printTo(Serial);
    json.printTo(configFile);
    configFile.close();
    //end save
  }
  // Initialize the output variables as outputs
  pinMode(atoi(output), OUTPUT);
  // Set outputs to LOW
  digitalWrite(atoi(output), LOW);;
  server.begin();
}
void loop(){
  WiFiClient client = server.available();   // Listen for incoming clients
  if (client) {                             // If a new client connects,
    Serial.println("New Client.");          // print a message out in the serial port
    String currentLine = "";                // make a String to hold incoming data from the client
    while (client.connected()) {            // loop while the client's connected
      if (client.available()) {             // if there's bytes to read from the client,
        char c = client.read();             // read a byte, then
        Serial.write(c);                    // print it out the serial monitor
        header += c;
        if (c == '\n') {                    // if the byte is a newline character
          // if the current line is blank, you got two newline characters in a row.
          // that's the end of the client HTTP request, so send a response:
          if (currentLine.length() == 0) {
            // HTTP headers always start with a response code (e.g. HTTP/1.1 200 OK)
            // and a content-type so the client knows what's coming, then a blank line:
            client.println("HTTP/1.1 200 OK");
            client.println("Content-type:text/html");
            client.println("Connection: close");
            client.println();
            // turns the GPIOs on and off
            if (header.indexOf("GET /output/on") >= 0) {
              Serial.println("Output on");
              outputState = "on";
              digitalWrite(atoi(output), HIGH);
            } else if (header.indexOf("GET /output/off") >= 0) {
              Serial.println("Output off");
              outputState = "off";
              digitalWrite(atoi(output), LOW);
            }
            // Display the HTML web page
            client.println("<!DOCTYPE html><html>");
            client.println("<head><meta name=\"viewport\" content=\"width=device-width, initial-scale=1\">");
            client.println("<link rel=\"icon\" href=\"data:,\">");
            // CSS to style the on/off buttons
            // Feel free to change the background-color and font-size attributes to fit your preferences
            client.println("<style>html { font-family: Helvetica; display: inline-block; margin: 0px auto; text-align: center;}");
            client.println(".button { background-color: #195B6A; border: none; color: white; padding: 16px 40px;");
            client.println("text-decoration: none; font-size: 30px; margin: 2px; cursor: pointer;}");
            client.println(".button2 {background-color: #77878A;}</style></head>");
            // Web Page Heading
            client.println("<body><h1>ESP8266 Web Server</h1>");
            // Display current state, and ON/OFF buttons for the defined GPIO
            client.println("<p>Output - State " + outputState + "</p>");
            // If the outputState is off, it displays the ON button
            if (outputState=="off") {
              client.println("<p><a href=\"/output/on\"><button class=\"button\">ON</button></a></p>");
            } else {
              client.println("<p><a href=\"/output/off\"><button class=\"button button2\">OFF</button></a></p>");
            }
            client.println("</body></html>");
            // The HTTP response ends with another blank line
            client.println();
            // Break out of the while loop
            break;
          } else { // if you got a newline, then clear currentLine
            currentLine = "";
          }
        } else if (c != '\r') {  // if you got anything else but a carriage return character,
          currentLine += c;      // add it to the end of the currentLine
        }
      }
    }
    // Clear the header variable
    header = "";
    // Close the connection
    client.stop();
    Serial.println("Client disconnected.");
    Serial.println("");
  }
}
และตามด้วย โค้ดสำหรับ ESP32 จะเห็นความแตกต่างว่า จะต้องการ SPIFFS เข้ามา และต้องเปลี่ยน esp8266wifi แลพ esp8266WebServer เป็น WiFi และ WebServer
/*********
  Rui Santos
  Complete project details at https://randomnerdtutorials.com
*********/
#include <FS.h> //this needs to be first, or it all crashes and burns...
//#include <ESP8266WiFi.h>
#include <WiFi.h>
#include <DNSServer.h>
//#include <ESP8266WebServer.h>
#include <WebServer.h>
#include <WiFiManager.h>          // https://github.com/tzapu/WiFiManager
#include <ArduinoJson.h>          // https://github.com/bblanchon/ArduinoJson
#include <SPIFFS.h> // for ESP8266 no need SPIFFS
// use json 5.13.2 only
// Set web server port number to 80
WiFiServer server(80);
// Variable to store the HTTP request
String header;
// Auxiliar variables to store the current output state
String outputState = "off";
// Assign output variables to GPIO pins
char output[2] = "5";
//flag for saving data
bool shouldSaveConfig = false;
//callback notifying us of the need to save config
void saveConfigCallback () {
  Serial.println("Should save config");
  shouldSaveConfig = true;
}
void setup() {
  Serial.begin(115200);
  //clean FS, for testing
  //SPIFFS.format();
  //read configuration from FS json
  Serial.println("mounting FS...");
  if (SPIFFS.begin()) {
    Serial.println("mounted file system");
    if (SPIFFS.exists("/config.json")) {
      //file exists, reading and loading
      Serial.println("reading config file");
      File configFile = SPIFFS.open("/config.json", "r");
      if (configFile) {
        Serial.println("opened config file");
        size_t size = configFile.size();
        // Allocate a buffer to store contents of the file.
        std::unique_ptr<char[]> buf(new char[size]);
        configFile.readBytes(buf.get(), size);
        DynamicJsonBuffer jsonBuffer;
        JsonObject& json = jsonBuffer.parseObject(buf.get());
        json.printTo(Serial);
        if (json.success()) {
          Serial.println("\nparsed json");
          strcpy(output, json["output"]);
        } else {
          Serial.println("failed to load json config");
        }
      }
    }
  } else {
    Serial.println("failed to mount FS");
  }
  //end read
  WiFiManagerParameter custom_output("output", "output", output, 2);
  // WiFiManager
  // Local intialization. Once its business is done, there is no need to keep it around
  WiFiManager wifiManager;
  //set config save notify callback
  wifiManager.setSaveConfigCallback(saveConfigCallback);
  // set custom ip for portal
  //wifiManager.setAPConfig(IPAddress(10,0,1,1), IPAddress(10,0,1,1), IPAddress(255,255,255,0));
  //add all your parameters here
  wifiManager.addParameter(&custom_output);
  // Uncomment and run it once, if you want to erase all the stored information
  wifiManager.resetSettings();
  //set minimu quality of signal so it ignores AP's under that quality
  //defaults to 8%
  //wifiManager.setMinimumSignalQuality();
  //sets timeout until configuration portal gets turned off
  //useful to make it all retry or go to sleep
  //in seconds
  //wifiManager.setTimeout(120);
  // fetches ssid and pass from eeprom and tries to connect
  // if it does not connect it starts an access point with the specified name
  // here  "AutoConnectAP"
  // and goes into a blocking loop awaiting configuration
  wifiManager.autoConnect("AutoConnectAP");
  // or use this for auto generated name ESP + ChipID
  //wifiManager.autoConnect();
  // if you get here you have connected to the WiFi
  Serial.println("Connected.");
  strcpy(output, custom_output.getValue());
  //save the custom parameters to FS
  if (shouldSaveConfig) {
    Serial.println("saving config");
    DynamicJsonBuffer jsonBuffer;
    JsonObject& json = jsonBuffer.createObject();
    json["output"] = output;
    File configFile = SPIFFS.open("/config.json", "w");
    if (!configFile) {
      Serial.println("failed to open config file for writing");
    }
    json.printTo(Serial);
    json.printTo(configFile);
    configFile.close();
    //end save
  }
  // Initialize the output variables as outputs
  pinMode(atoi(output), OUTPUT);
  // Set outputs to LOW
  digitalWrite(atoi(output), LOW);;
  server.begin();
}
void loop(){
  WiFiClient client = server.available();   // Listen for incoming clients
  if (client) {                             // If a new client connects,
    Serial.println("New Client.");          // print a message out in the serial port
    String currentLine = "";                // make a String to hold incoming data from the client
    while (client.connected()) {            // loop while the client's connected
      if (client.available()) {             // if there's bytes to read from the client,
        char c = client.read();             // read a byte, then
        Serial.write(c);                    // print it out the serial monitor
        header += c;
        if (c == '\n') {                    // if the byte is a newline character
          // if the current line is blank, you got two newline characters in a row.
          // that's the end of the client HTTP request, so send a response:
          if (currentLine.length() == 0) {
            // HTTP headers always start with a response code (e.g. HTTP/1.1 200 OK)
            // and a content-type so the client knows what's coming, then a blank line:
            client.println("HTTP/1.1 200 OK");
            client.println("Content-type:text/html");
            client.println("Connection: close");
            client.println();
            // turns the GPIOs on and off
            if (header.indexOf("GET /output/on") >= 0) {
              Serial.println("Output on");
              outputState = "on";
              digitalWrite(atoi(output), HIGH);
            } else if (header.indexOf("GET /output/off") >= 0) {
              Serial.println("Output off");
              outputState = "off";
              digitalWrite(atoi(output), LOW);
            }
            // Display the HTML web page
            client.println("<!DOCTYPE html><html>");
            client.println("<head><meta name=\"viewport\" content=\"width=device-width, initial-scale=1\">");
            client.println("<link rel=\"icon\" href=\"data:,\">");
            // CSS to style the on/off buttons
            // Feel free to change the background-color and font-size attributes to fit your preferences
            client.println("<style>html { font-family: Helvetica; display: inline-block; margin: 0px auto; text-align: center;}");
            client.println(".button { background-color: #195B6A; border: none; color: white; padding: 16px 40px;");
            client.println("text-decoration: none; font-size: 30px; margin: 2px; cursor: pointer;}");
            client.println(".button2 {background-color: #77878A;}</style></head>");
            // Web Page Heading
            client.println("<body><h1>ESP8266 Web Server</h1>");
            // Display current state, and ON/OFF buttons for the defined GPIO
            client.println("<p>Output - State " + outputState + "</p>");
            // If the outputState is off, it displays the ON button
            if (outputState=="off") {
              client.println("<p><a href=\"/output/on\"><button class=\"button\">ON</button></a></p>");
            } else {
              client.println("<p><a href=\"/output/off\"><button class=\"button button2\">OFF</button></a></p>");
            }
            client.println("</body></html>");
            // The HTTP response ends with another blank line
            client.println();
            // Break out of the while loop
            break;
          } else { // if you got a newline, then clear currentLine
            currentLine = "";
          }
        } else if (c != '\r') {  // if you got anything else but a carriage return character,
          currentLine += c;      // add it to the end of the currentLine
        }
      }
    }
    // Clear the header variable
    header = "";
    // Close the connection
    client.stop();
    Serial.println("Client disconnected.");
    Serial.println("");
  }
}
สำหรับโค้ดของ heltec LoRa Esp32 นั้น จะเหมือนกันกับ ESP32 เลย
/*********
  Rui Santos
  Complete project details at https://randomnerdtutorials.com
*********/
#include <FS.h> //this needs to be first, or it all crashes and burns...
#include <WiFi.h>
#include <DNSServer.h>
#include <WebServer.h>
#include <WiFiManager.h>          // https://github.com/tzapu/WiFiManager
#include <ArduinoJson.h>          // https://github.com/bblanchon/ArduinoJson
#include <SPIFFS.h> // for ESP8266 no need SPIFFS
// use json 5.13.2 only
// Set web server port number to 80
WiFiServer server(80);
// Variable to store the HTTP request
String header;
// Auxiliar variables to store the current output state
String outputState = "off";
// Assign output variables to GPIO pins
char output[2] = "5";
//flag for saving data
bool shouldSaveConfig = false;
//callback notifying us of the need to save config
void saveConfigCallback () {
  Serial.println("Should save config");
  shouldSaveConfig = true;
}
void setup() {
  Serial.begin(115200);
  //clean FS, for testing
  //SPIFFS.format();
  //read configuration from FS json
  Serial.println("mounting FS...");
  if (SPIFFS.begin()) {
    Serial.println("mounted file system");
    if (SPIFFS.exists("/config.json")) {
      //file exists, reading and loading
      Serial.println("reading config file");
      File configFile = SPIFFS.open("/config.json", "r");
      if (configFile) {
        Serial.println("opened config file");
        size_t size = configFile.size();
        // Allocate a buffer to store contents of the file.
        std::unique_ptr<char[]> buf(new char[size]);
        configFile.readBytes(buf.get(), size);
        DynamicJsonBuffer jsonBuffer;
        JsonObject& json = jsonBuffer.parseObject(buf.get());
        json.printTo(Serial);
        if (json.success()) {
          Serial.println("\nparsed json");
          strcpy(output, json["output"]);
        } else {
          Serial.println("failed to load json config");
        }
      }
    }
  } else {
    Serial.println("failed to mount FS");
  }
  //end read
  WiFiManagerParameter custom_output("output", "output", output, 2);
  // WiFiManager
  // Local intialization. Once its business is done, there is no need to keep it around
  WiFiManager wifiManager;
  //set config save notify callback
  wifiManager.setSaveConfigCallback(saveConfigCallback);
  // set custom ip for portal
  //wifiManager.setAPConfig(IPAddress(10,0,1,1), IPAddress(10,0,1,1), IPAddress(255,255,255,0));
  //add all your parameters here
  wifiManager.addParameter(&custom_output);
  // Uncomment and run it once, if you want to erase all the stored information
  // wifiManager.resetSettings();  // uncomment เพื่อ reset  ssid password เดิม
  //set minimu quality of signal so it ignores AP's under that quality
  //defaults to 8%
  //wifiManager.setMinimumSignalQuality();
  //sets timeout until configuration portal gets turned off
  //useful to make it all retry or go to sleep
  //in seconds
  //wifiManager.setTimeout(120);
  // fetches ssid and pass from eeprom and tries to connect
  // if it does not connect it starts an access point with the specified name
  // here  "AutoConnectAP"
  // and goes into a blocking loop awaiting configuration
  wifiManager.autoConnect("สมองไอโอที");
  // or use this for auto generated name ESP + ChipID
  //wifiManager.autoConnect();
  // if you get here you have connected to the WiFi
  Serial.println("Connected.");
  strcpy(output, custom_output.getValue());
  //save the custom parameters to FS
  if (shouldSaveConfig) {
    Serial.println("saving config");
    DynamicJsonBuffer jsonBuffer;
    JsonObject& json = jsonBuffer.createObject();
    json["output"] = output;
    File configFile = SPIFFS.open("/config.json", "w");
    if (!configFile) {
      Serial.println("failed to open config file for writing");
    }
    json.printTo(Serial);
    json.printTo(configFile);
    configFile.close();
    //end save
  }
  // Initialize the output variables as outputs
  pinMode(atoi(output), OUTPUT);
  // Set outputs to LOW
  digitalWrite(atoi(output), LOW);;
  server.begin();
}
void loop(){
  WiFiClient client = server.available();   // Listen for incoming clients
  if (client) {                             // If a new client connects,
    Serial.println("New Client.");          // print a message out in the serial port
    String currentLine = "";                // make a String to hold incoming data from the client
    while (client.connected()) {            // loop while the client's connected
      if (client.available()) {             // if there's bytes to read from the client,
        char c = client.read();             // read a byte, then
        Serial.write(c);                    // print it out the serial monitor
        header += c;
        if (c == '\n') {                    // if the byte is a newline character
          // if the current line is blank, you got two newline characters in a row.
          // that's the end of the client HTTP request, so send a response:
          if (currentLine.length() == 0) {
            // HTTP headers always start with a response code (e.g. HTTP/1.1 200 OK)
            // and a content-type so the client knows what's coming, then a blank line:
            client.println("HTTP/1.1 200 OK");
            client.println("Content-type:text/html");
            client.println("Connection: close");
            client.println();
            // turns the GPIOs on and off
            if (header.indexOf("GET /output/on") >= 0) {
              Serial.println("Output on");
              outputState = "on";
              digitalWrite(atoi(output), HIGH);
            } else if (header.indexOf("GET /output/off") >= 0) {
              Serial.println("Output off");
              outputState = "off";
              digitalWrite(atoi(output), LOW);
            }
            // Display the HTML web page
            client.println("<!DOCTYPE html><html>");
            client.println("<head><meta name=\"viewport\" content=\"width=device-width, initial-scale=1\">");
            client.println("<link rel=\"icon\" href=\"data:,\">");
            // CSS to style the on/off buttons
            // Feel free to change the background-color and font-size attributes to fit your preferences
            client.println("<style>html { font-family: Helvetica; display: inline-block; margin: 0px auto; text-align: center;}");
            client.println(".button { background-color: #195B6A; border: none; color: white; padding: 16px 40px;");
            client.println("text-decoration: none; font-size: 30px; margin: 2px; cursor: pointer;}");
            client.println(".button2 {background-color: #77878A;}</style></head>");
            // Web Page Heading
            client.println("<body><h1>ESP8266 Web Server</h1>");
            // Display current state, and ON/OFF buttons for the defined GPIO
            client.println("<p>Output - State " + outputState + "</p>");
            // If the outputState is off, it displays the ON button
            if (outputState=="off") {
              client.println("<p><a href=\"/output/on\"><button class=\"button\">ON</button></a></p>");
            } else {
              client.println("<p><a href=\"/output/off\"><button class=\"button button2\">OFF</button></a></p>");
            }
            client.println("</body></html>");
            // The HTTP response ends with another blank line
            client.println();
            // Break out of the while loop
            break;
          } else { // if you got a newline, then clear currentLine
            currentLine = "";
          }
        } else if (c != '\r') {  // if you got anything else but a carriage return character,
          currentLine += c;      // add it to the end of the currentLine
        }
      }
    }
    // Clear the header variable
    header = "";
    // Close the connection
    client.stop();
    Serial.println("Client disconnected.");
    Serial.println("");
  }
}
ทั้ง 3 บอร์ดนี้ เมื่อทำการ upload code และเริ่มทำงานแล้ว มันจะรอให้เราทำการ config โดยเราจะต้องใช้คอมพิวเตอร์ หรือ มือถือ เชื่อมต่อเข้ามาที่ WiFi ที่ชื่อ AutoConnectAP หรือ สมองไอโอที ก่อน จากนั้น ต่อ browser ไปที่ IP 192.168.4.1 ก็จะพบกับหน้าจอ การตั้งค่า WiFi
โดยทำการเลือก WiFi ที่เราต้องการและกำหนดค่า password ลงไป
ข้อสังเกต เราจะทำการ ปิด คอมเม้นท์ การ reset ไว้ก่อนการทำการอัพโหลดขั้นสุดท้ายก่อนส่งไปใช้งาน
// Uncomment and run it once, if you want to erase all the stored information
// wifiManager.resetSettings(); // uncomment เพื่อ reset ssid password เดิม
ขอขอบคุณเวบไซต์ https://randomnerdtutorials.com/
และคลิปจากเพื่อนๆ ของเรา